Tag: asia

  • DIY Siargao: Budget-Friendly Tips and Local Transportation Hacks

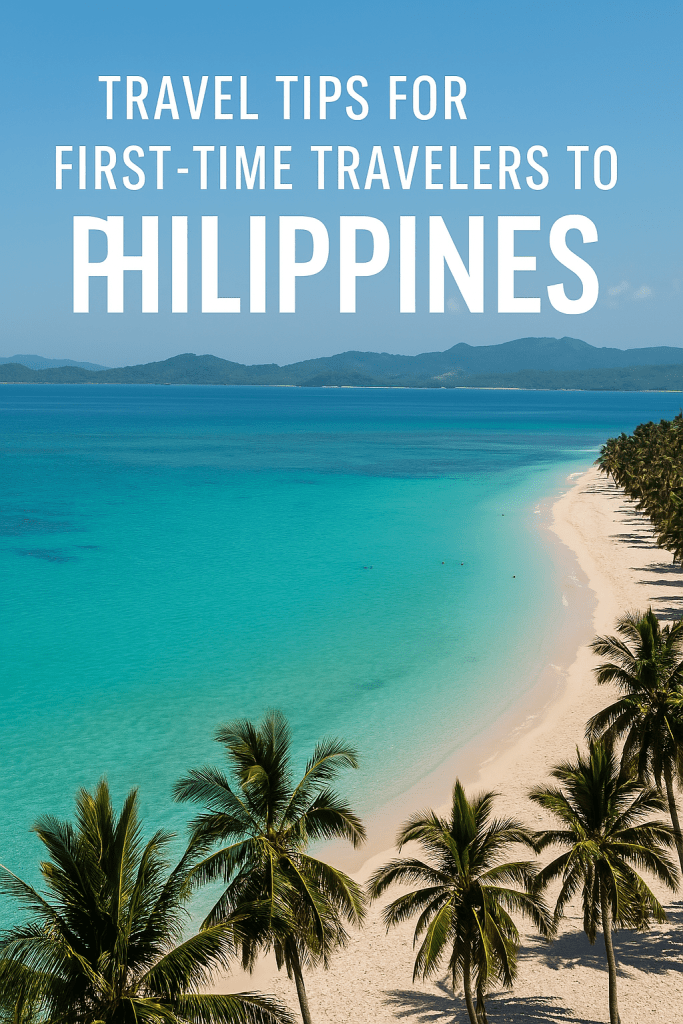
    Dreaming of palm-lined roads, cerulean waves, and island vibes without the hefty price tag? Siargao might be your tropical paradise—and the good news is, you can experience its magic even on a budget. Whether you’re a solo traveler, a backpacking couple, or exploring the Philippines with friends, this guide will help you make the most of Siargao without breaking the bank.

    Why Visit Siargao?

    Often dubbed the “Surfing Capital of the Philippines,” Siargao is more than just Cloud 9 waves. It boasts a laid-back island culture, crystal-clear lagoons, hidden beaches, and warm locals. With a little planning, you can explore its gems DIY-style—no need for pricey tour packages.


    Getting to Siargao on a Budget

    ✈️ Cheap Flights and Ferry Alternatives

    • Fly via Cebu or Clark: Direct flights from Cebu to Sayak Airport (Siargao) are often cheaper than flights from Manila. Try mixing and matching budget airlines like Cebu Pacific or AirAsia.
    • Ferry Option: For the truly budget-savvy, take a ferry from Surigao City. From Manila, take a flight or bus to Butuan or Surigao, then hop on the ferry to Dapa Port in Siargao. It’s longer but can be cheaper and scenic!

    💡 Tip: Use fare comparison tools like Aviasales to find the best flight and ferry combos.


    Budget-Friendly Accommodation

    Siargao offers plenty of low-cost stays:

    • Homestays & Hostels: Try areas in General Luna for dorms or local homes (₱300–₱700/night).
    • Budget Bungalows: Fan rooms and nipa huts can range from ₱800–₱1,200.

    Booking ahead during peak season (March–October) can save you a lot. Look for options on Booking.com or Agoda and check if any include free breakfast or airport pick-up.


    Local Transportation Hacks

    🛵 Rent a Motorbike

    Your best friend in Siargao is a scooter. Daily rentals go for ₱350–₱500. Gas is cheap and sold in Coke bottles along the road.

    • Pros: Total freedom to explore at your pace.
    • Cons: Be cautious of potholes, especially during rainy season.

    💡 Bonus Tip: Download offline Google Maps ahead of time. Reception can be patchy in rural areas.

    🛺 Habal-Habal (Motorbike Taxis)

    If you’re not confident riding, habal-habal is the next best thing. It’s also great for short distances.

    • Typical Rates: ₱20–₱100 depending on distance. Negotiate before hopping on!
    • Ask locals for fair rates—they’re usually happy to help.

    🚐 Shared Vans or Tricycles

    • For airport transfers, shared vans to General Luna cost around ₱300.
    • Tricycles can be flagged for local trips. Always agree on a price first.

    Eat Like a Local: Cheap Eats in Siargao

    You don’t need beachfront cafes to eat well here.

    🍽️ Local Carinderias (Road-side eateries)

    • Meals for ₱50–₱100.
    • Try dishes like adobo, sinigang, and grilled fish with rice.

    🥥 Fresh Finds

    • Fresh buko (coconut) for ₱20–₱30.
    • Barbecue sticks and lumpia from roadside stalls.

    📍 Budget Picks:

    • Mama’s Grill – huge portions and tasty options
    • Kermit Siargao – pricier but worth a visit for pizza
    • Local BBQ stalls in General Luna or Dapa – best for dinner on a dime

    Must-Do DIY Adventures

    Skip the organized tours and do it yourself:

    🏄 Surfing Cloud 9

    • Rent a board for ₱300/hour.
    • Hire a local instructor for ₱500 if you’re a beginner.

    🌴 Island Hopping on a Budget

    Book with boatmen directly at the pier for cheaper rates than agencies.

    • 3-Island Tour (Daku, Guyam, Naked): ₱1,500–₱2,000/boat (good for groups up to 6–8).
    • Bring your own lunch or shop for fresh seafood at Daku Island and grill it there.

    🏞️ Sugba Lagoon and Magpupungko Tidal Pools

    • Rent a motorbike and go early to avoid the crowds.
    • Entrance fees range from ₱50–₱100.

    Bonus Tips to Save More

    • Bring Cash: ATMs are limited and sometimes offline. Withdraw in advance.
    • Travel Off-Peak: Rainy season (Nov–Feb) offers cheaper rates, but plan around typhoons.
    • Group Up: Split costs on boat rides or van rentals with fellow travelers.
    • Local SIM with Data: Buy a Globe SIM and load it with a budget-friendly data promo. It’ll help with maps, bookings, and keeping in touch.

    Final Thoughts

    Exploring Siargao doesn’t require a luxury budget—just a sense of adventure and a few smart hacks. From zipping around on scooters to sipping coconuts under palm trees, your DIY Siargao experience can be just as rich and rewarding (and often more authentic) than any pre-packaged tour.

    Pack light, stay curious, and let the island spirit guide you.

    🌴 Happy travels from WanderMapped!

  • The Ultimate DIY Batanes Trip: Flights, Homestays, and Your Daily Budget!

    Mabuhay, fellow wanderers! It’s your Wandermapped traveler here, back with another gem from my bleoved archipelago. Today, we’re diving deep into a destination that’s been on every serious traveler’s bucket list: Batanes. Ah, Batanes. It’s more than just a place; it’s an experience that carves itself into your soul. And while many opt for packaged tours, believe me, the true magic of Batanes unfolds when you go the DIY route. It’s not just about saving pesos; it’s about connecting with the local culture, setting your own pace, and discovering hidden corners. So, let’s break down how you can craft your own unforgettable Batanes adventure.

    Getting There: The Flight Hunt (It’s All About Timing!)

    Let’s be honest, the flight is often the biggest chunk of your Batanes budget. There are no ferries from Luzon, so flying is your only option.

    • Airlines: Currently, Philippine Airlines (PAL Express) and Cebu Pacific are your main carriers flying into Basco (BSO) from Manila (MNL). Occasionally, there are flights from Clark (CRK) as well.
    • Booking Strategy: This is crucial. Book your flights WAY in advance. I’m talking 3-6 months, especially if you’re aiming for peak season (April-May, October-November, and long weekends). Seat sales are rare for Batanes, but when they do pop up, they disappear faster than a plate of adobo at a fiesta. Be flexible with your dates if possible; weekdays are almost always cheaper than weekends.
    • Connecting Flights: If you’re coming from other parts of the Philippines, you’ll likely need to connect via Manila. Factor in enough layover time, as domestic flights can sometimes experience delays.
    • My Tip: Set up flight alerts on Skyscanner or Google Flights. While full-blown seat sales are uncommon, you might catch a slightly lower fare if you’re vigilant. I once snagged a roundtrip for around PHP 8,000 by being super quick on the draw! Normal fares can range from PHP 10,000 to PHP 15,000+ for a roundtrip.

    Homestays: Your Home Away From Home

    One of the most charming aspects of Batanes is the prevalence of homestays. These aren’t just budget-friendly; they offer an authentic glimpse into Ivatan life. You’ll often find yourself chatting with your hosts, learning about their culture, and feeling truly welcomed.

    • Where to Stay: Most homestays are located in Basco, the capital. This is your best base for exploring North and South Batan, and it’s where you’ll find most of the amenities. There are also a few options in Sabtang and Itbayat if you plan an overnight stay there.
    • Finding Them:
      • Online Travel Agencies (OTAs): While Agoda and Booking.com list some, the selection isn’t as extensive as for other destinations.
      • Facebook Groups/Pages: This is often your best bet! Search for “Batanes Homestays” or “Basco Homestays.” Many local owners list their properties here, often with contact numbers. You can communicate directly.
      • Word of Mouth: Ask fellow travelers or online communities for recommendations.
      • Contacting Locals: Sometimes, a quick Google search for “Basco homestay contact numbers” can yield results.
    • What to Expect:
      • Simple but Clean: Don’t expect luxury resorts. Homestays are typically basic but comfortable, with private or shared bathrooms. Air-conditioning might be rare, but the cool Batanes breeze often makes it unnecessary.
      • Warm Hospitality: This is a given. Ivatan people are incredibly kind and accommodating.
      • Breakfast Often Included: Many homestays include a simple Filipino breakfast, which is a great way to start your day and save on costs.
      • Price Range: Expect to pay anywhere from PHP 350 – PHP 800 per person per night for a good homestay. Some private rooms might go up to PHP 1,500 – PHP 2,000 per night.

    Your Daily Budget: Making Every Peso Count

    Now for the nitty-gritty. This is an estimated breakdown for a solo traveler on a DIY Batanes trip. Adjust accordingly if you’re traveling with a companion or prefer more creature comforts.

    • Accommodation: PHP 500 – PHP 800 (based on a comfortable homestay)
    • Food:
      • Breakfast: Often included with homestay. If not, PHP 100 – PHP 150 for a local meal.
      • Lunch/Dinner: PHP 150 – PHP 300 per meal. Eating at local carinderias (eateries) or ordering home-cooked meals from your homestay are your best budget options. Seafood can be pricier.
      • Snacks/Drinks: PHP 50 – PHP 100.
      • Daily Food Total: PHP 400 – PHP 700 (if you’re careful)
    • Transportation (Daily Average – very variable depending on your activities):
      • Tours (DIY): Renting a tricycle for a whole day tour (North Batan, South Batan) typically costs around PHP 1,500 – PHP 2,000. If you split this with 2-3 others, it significantly reduces your cost per person. So, if you’re solo, budget around PHP 750 – PHP 1,000 for a shared tour.
      • Motorbike Rental: Around PHP 500 – PHP 800 per day for self-drive. Fuel extra.
      • Sabtang Trip: This will be a separate cost – boat fare (PHP 150-200 RT), tricycle tour (PHP 300-500 per person if shared).
      • Daily Transportation Average: PHP 400 – PHP 800 (depending on your tour activities that day)
    • Activities/Entrance Fees:
      • Environmental Fee: PHP 350 (one-time payment upon arrival).
      • Sabtang Environmental Fee: PHP 200 (one-time for Sabtang).
      • Most view decks and natural attractions are free. Some cultural sites might have a small donation box.
      • Daily Activity Average: PHP 50 – PHP 100 (if you spread out the one-time fees and account for minor donations)
    • Miscellaneous (Water, toiletries, small souvenirs): PHP 100 – PHP 200

    Estimated Daily Budget (Excluding Flights): PHP 1,500 – PHP 2,600

    This is a comfortable budget for a DIY traveler. You can definitely go lower if you’re extremely frugal (e.g., sharing tricycle tours always, eating only at carinderias), or higher if you splurge on seafood every night.

    My Tried and Tested Batanes Tips for the DIYer:

    • Connect with Fellow Travelers: Upon arrival, chat with other tourists at your homestay or at popular spots. You might find people to share tricycle tours with, significantly cutting down costs. This is how I often found tour mates!
    • Embrace the Tricycle: It’s the primary mode of transport. Negotiate rates for tours, or for point-to-point transfers within Basco.
    • Motorbike Adventures: If you’re confident riding, renting a motorbike gives you ultimate freedom to explore at your own pace. Just be mindful of the sometimes strong winds and winding roads.
    • Pack Light: Seriously. Small planes mean stricter baggage allowances. Plus, it’s easier to move around.
    • Bring Cash: While some establishments in Basco accept Gcash or credit cards, many homestays and local eateries are cash-only. ATMs are available in Basco, but it’s always wise to have enough cash on hand.
    • Respect Local Culture: The Ivatans are a gentle and respectful people. Be mindful of their traditions and always ask permission before taking photos of people or private property.
    • Flexibility is Key: Weather in Batanes can be unpredictable. Flights can be delayed or cancelled due to strong winds or storms. Build in a buffer day or two if your schedule allows, just in case.
    • Don’t Rush: Batanes is not a place to tick off boxes. Take your time, soak in the views, sit by the cliff, and simply be. That’s where the real magic lies.

    The Batanes Promise

    Batanes isn’t just about the iconic lighthouses and rolling hills; it’s about the feeling of being in a place untouched, where life moves at a different pace, and the people are as warm as the sunshine. Going DIY allows you to truly immerse yourself in this unique culture and create memories that are truly your own. So, pack your bags, prepare for an adventure, and get ready to be utterly captivated by the beauty of the Northernmost frontier of the Philippines.

    Have you been to Batanes? What are your ultimate DIY tips? Share them in the comments below!

  • How to Fly Around the Philippines in 2025: Budget Airlines Compared

    The Philippines is an archipelago of over 7,000 islands, making air travel one of the most efficient ways to explore its stunning destinations. Whether you’re chasing waterfalls in Cebu, surfing in Siargao, or soaking in sunsets on Palawan’s beaches, hopping on a domestic flight can save you precious travel time. In this post, we’ll compare the top budget airlines flying around the Philippines in 2025—so you can choose the best option for your itinerary and your wallet.

    ✈️ Top Budget Airlines in the Philippines (2025)

    1. Cebu Pacific

    • Hub: Manila (MNL), Cebu (CEB), Davao (DVO)
    • Baggage Policy: 7 kg carry-on included; checked baggage costs extra
    • In-Flight Experience: No-frills, buy-on-board snacks
    • Pros:
      • Frequent seat sales
      • Extensive domestic network
      • Flights to major tourist destinations like Boracay, Bohol, and Siargao
    • Cons:
      • Delays are not uncommon
      • Add-ons can drive the price up

    💡 Tip: Watch out for “Piso Fare” promos—tickets can go as low as PHP 1 (plus taxes and fees).


    2. AirAsia Philippines

    • Hub: Manila (MNL), Clark (CRK), Cebu (CEB)
    • Baggage Policy: 7 kg carry-on included; checked baggage available for a fee
    • In-Flight Experience: Budget-friendly meals and snacks, optional upgrades
    • Pros:
      • Great deals during promotions
      • Smooth booking app and website
      • Fly-Thru options if you’re coming from abroad
    • Cons:
      • Fewer flights to smaller islands
      • Legroom can be tight

    🧳 Tip: Pre-book your baggage during checkout—it’s cheaper than adding it later.


    3. PAL Express (Philippine Airlines’ Low-Cost Arm)

    • Hub: Manila (MNL)
    • Baggage Policy: Usually includes 10-20 kg checked baggage depending on the fare
    • In-Flight Experience: More comfortable seats, sometimes complimentary snacks
    • Pros:
      • Often more punctual
      • Better service compared to other budget carriers
    • Cons:
      • Slightly more expensive
      • Smaller domestic network

    🍴 Tip: If you value a smoother experience and a little extra comfort, PAL Express might be worth the upgrade.


    4. Sunlight Air

    • Hub: Manila (MNL)
    • Baggage Policy: 10 kg carry-on; 20 kg checked baggage included
    • In-Flight Experience: Newer aircraft, complimentary snacks, boutique feel
    • Pros:
      • Fly direct to niche destinations like Busuanga (Coron) and Siargao
      • Fewer crowds, newer fleet
    • Cons:
      • Limited routes
      • Newer airline, so fewer daily schedules

    🌅 Tip: Great option if you’re heading to upscale beach destinations and value a quieter flying experience.


    🗺️ Best Routes to Popular Tourist Spots

    DestinationBest AirportAirline OptionsNotes
    Boracay (Caticlan)MPHCebu Pacific, AirAsia, PALCaticlan is closer than Kalibo
    Palawan (Puerto Princesa)PPSCebu Pacific, AirAsia, PAL, SunlightPPS is the main hub; El Nido has its own small airport
    SiargaoIAOCebu Pacific, SunlightFewer flights, book early
    Bohol (Panglao)TAGAirAsia, PALLess busy than Cebu, still scenic
    CebuCEBAll major carriersGreat central hub for island hopping
    DavaoDVOAll major carriersAccess to Mindanao adventures

    💸 Money-Saving Tips for Flying Around the Philippines

    • Book Early: Prices rise as seats fill. Book 2–3 months in advance if possible.
    • Set Fare Alerts: Use tools like Aviasales to get notified of the best deals.
    • Travel Light: Avoid checked baggage fees by packing smart (check out our Ultimate Packing List).
    • Fly During Off-Peak Hours: Early morning or late-night flights are often cheaper.
    • Compare Airports: Consider flying into nearby airports like Clark or Mactan to avoid Manila congestion.

    🧭 Final Thoughts

    Flying around the Philippines in 2025 is affordable and convenient—if you know where to look and how to plan. Budget airlines like Cebu Pacific and AirAsia offer the cheapest fares, while PAL Express and Sunlight Air provide a bit more comfort and convenience. Your best pick depends on your route, budget, and travel style.

    Ready to take off? ✈️ Check out deals on domestic flights with our favorite flight search tool:

    👉 Find Cheap Flights on Aviasales

    Happy island hopping! 🌴

  • 🇹🇼 One Week in Taiwan: A Travel Itinerary for Filipino Travelers

    Explore the Best of Taipei, Taichung, and Taroko Gorge

    Taiwan is a welcoming destination for Filipino travelers—no visa required for stays up to 14 days! Whether you’re in it for the night markets, nature escapes, or cultural heritage, this one-week itinerary hits all the highlights.

    🛫 Day 1: Arrival in Taipei – Get Oriented

    Suggested Flight: Morning or early afternoon arrival in Taoyuan International Airport

    To Do:

    • Buy an EasyCard (transport pass) and SIM card at the airport.
    • Check in to your Taipei hotel.
    • Explore Ximending – Taipei’s youth district full of shops, street food, and energy.
    • Try your first Taiwanese bubble tea!

    Recommended Food:

    • Hot Star Large Fried Chicken
    • Ah-Chung Mian Xian (thick vermicelli noodles)


    🏛️ Day 2: Taipei Cultural Day

    Morning:

    • Visit Chiang Kai-Shek Memorial Hall
    • Explore Lungshan Temple in Wanhua District

    Afternoon:

    • Head to Taipei 101 (optional observatory visit)
    • Shop at Shin Kong Mitsukoshi malls nearby

    Evening:

    • Eat your way through Raohe Night Market

    🏞️ Day 3: Nature & Views – Northern Taiwan Day Trip

    Take a guided tour (or DIY with train/bus) to:

    • Yehliu Geopark (unique rock formations)
    • Jiufen Old Street (inspiration for Spirited Away)
    • Shifen Waterfall + sky lantern release at Shifen Old Street

    ⏱️ Book a day tour to cover all these spots efficiently.


    🚄 Day 4: High-Speed Rail to Taichung

    • Ride the THSR (Taiwan High-Speed Rail) to Taichung (~1 hour)
    • Visit the colorful Rainbow Village
    • Afternoon at Gaomei Wetlands for sunset

    Evening:

    • Explore Fengjia Night Market, Taiwan’s largest

    📍 Where to Stay: Choose a hotel near Taichung Station or Fengjia area for convenience


    🌳 Day 5: Day Trip to Sun Moon Lake

    • Ride a bus or join a day tour to Sun Moon Lake
    • Try the lake cruise, rent a bike, and visit Wenwu Temple
    • Optional: Ride the Sun Moon Lake Ropeway to Formosan Aboriginal Culture Village

    🍵 Try local Sun Moon Lake black tea


    🚆 Day 6: Hualien & Taroko Gorge Adventure

    • Take an early train to Hualien (book tickets in advance)
    • Join a Taroko Gorge tour to see:
      • Eternal Spring Shrine
      • Swallow Grotto
      • Shakadang Trail

    🌿 Taroko Gorge is one of Taiwan’s most scenic natural wonders.

    📌 Stay overnight in Hualien or take an evening train back to Taipei if you prefer.


    🎁 Day 7: Taipei Last Hurrah + Souvenir Shopping

    • Visit Dihua Street for traditional shops and snacks
    • Grab souvenirs at Kuang Nan or Eslite Bookstore
    • Relax at Beitou Hot Springs or visit a local café

    🛍️ Souvenir Suggestions:

    • Pineapple cakes
    • Oolong tea
    • Face masks (from Taiwanese skincare brands)

    ✈️ Departure: Fly Back to the Philippines

    Take the Airport MRT or pre-book a shuttle transfer to Taoyuan Airport. Most Filipino travelers prefer late afternoon or evening flights back home.


    💡 Travel Tips for Filipinos in Taiwan:

    • No visa needed for up to 14 days!
    • Use EasyCard for MRT, buses, and even convenience store purchases
    • Most signs have English, and locals are helpful
    • Bring a jacket! Weather can be chilly, especially from December to March

  • Ship or Plane? Choosing the Best Way to Travel Around the Philippines on a Two-Week Vacation

    ✈️ Flying Around the Philippines: Fast and Convenient

    Pros:

    • Speed: Domestic flights are short and ideal for maximizing limited vacation time.
    • Good Connectivity: Most tourist spots—like Cebu, Palawan, and Siargao—have airports.
    • Frequent Departures: Budget airlines offer multiple daily flights on popular routes.

    Cons:

    • Delays & Weather Risks: Especially during rainy season (June–October).
    • Extra Fees: Baggage, seats, and meals are often not included in base fares.
    • Transfers Needed: Some airports still require land or boat travel to your final destination.

    💡 WanderMapped Tip: Book flights early with Aviasales to lock in low fares and compare multiple airlines at once.


    🚢 Traveling by Ship: Scenic and Budget-Friendly

    Pros:

    • Lower Cost: Ferry tickets are often cheaper than flights.
    • More Luggage Flexibility: Fewer baggage restrictions than airlines.
    • Scenic Travel: Enjoy ocean views and sunsets, especially on overnight routes.

    Cons:

    • Time-Consuming: Long travel times, e.g., Manila to Cebu takes ~22 hours.
    • Limited Schedules: Not as frequent as flights—some routes run only a few times weekly.
    • Weather-Dependent: Sailing can be delayed or canceled in rough sea conditions.

    💡 WanderMapped Tip: Use 2Go Travel and OceanJet to book ferries. Reserve in advance for better cabin options!


    🏝️ Best of Both Worlds: A Mixed Travel Itinerary

    Want flexibility and adventure? Combine both modes of transport:

    • Fly from Manila to Cebu.
    • Ferry to nearby islands like Bohol or Siquijor.
    • Fly back to Manila from your final destination.

    This combo saves time on long legs while letting you enjoy slower scenic routes between neighboring islands.


    🌊 Final Thoughts

    Choosing between ships and planes in the Philippines depends on your:

    • Budget
    • Schedule
    • Preferred pace of travel

    With only two weeks, flying helps cover more ground, but ferries give you a richer, more immersive experience. A hybrid plan is often the smartest choice.

    ✅ Related Posts You Might Like:


    Follow @WanderMapped on Instagram for real-time travel inspiration, local tips, and upcoming guides!

    Have questions or want help planning your itinerary? Drop them in the comments below!

  • 🐋 Overnight Itinerary in Oslob, Cebu: Whale Sharks, Waterfalls & Canyoneering Adventures

    Looking for an action-packed weekend getaway in the Philippines? Oslob in southern Cebu offers a once-in-a-lifetime encounter with whale sharks, stunning natural scenery, and an adrenaline-pumping waterfall adventure — all in just 24 hours. This itinerary is perfect for those flying in from Manila or nearby islands looking for a short but unforgettable trip.


    🌍 Why Oslob?

    Most travelers come for the whale sharks, but Oslob is surrounded by hidden gems like waterfalls, heritage ruins, and white-sand beaches. Add in nearby destinations like Samboan, and you’ve got the ultimate tropical adventure — even on a tight schedule.

    ✈️ Time-saving tip: Fly to Dumaguete (DGT) instead of Cebu City. From Dumaguete Airport, you’re just a 30-minute ferry ride to southern Cebu — way faster than the 4–5 hour land trip from Cebu City.


    ✈️ How to Get to Oslob

    Option 1: From Dumaguete

    • Fly to Dumaguete Airport (DGT)
    • Take a tricycle/taxi at the airport to Sibulan Port (~15 mins)
    • Board a passenger fast ferry craft to Liloan Port, Cebu (~30 mins)
    • Ride a bus or tricycle to Oslob (~40 mins)

    Option 2: From Cebu City

    • Ride a Ceres Bus from Cebu South Terminal to Oslob (~4–5 hours)
    • Buses depart early — perfect if you’re planning a morning arrival

    🌄 Day 1: Arrival & Aguinid Falls Canyoneering

    12:00 PM – Check-in to Your Stay
    Book a beachfront guesthouse or eco-resort in Tan-awan, Oslob, close to the whale shark activity area. I personally would recommend trying Bangcogon Resort and Restaurant (https://oslobtourist.com.ph/) – a beachfront property with stunning views of Sumilon Island. It’s also the staging point for boat rides to Sumilon. The resort owners are wonderful and accommodating people, who will take care of your needs and all activities.

    1:00 PM – Conquer Aguinid Falls (Levels 1–8)
    Travel 45 minutes south to Aguinid Falls in Samboan for a guided multi-level canyoneering adventure. You’ll hike, climb, and splash your way up 8 stunning tiers of limestone falls surrounded by tropical forest.

    Travel tip: Wear aqua shoes and bring a dry bag. A licensed guide is required and available on-site. Expect 2–3 hours of pure fun!

    5:00 PM – Head Back & Rest
    Return to Oslob, freshen up, and relax after your canyoneering adventure.

    6:30 PM – Dinner by the Coast
    Try local favorites like grilled squid, kinilaw, or Cebu lechon at casual seaside restaurants.

    8:00 PM – Sleep Early
    You’ll need an early wake-up call for the whale shark encounter!


    🐋 Day 2: Whale Sharks & Heritage Sites

    5:30 AM – Rise & Shine
    Wake up early to prep for one of the most exciting marine activities in the country.

    6:00 AM – Whale Shark Watching
    A short briefing is followed by a 30-minute session with the gentle giants. You can snorkel or stay on the boat. This activity is heavily regulated — always respect the wildlife.

    7:30 AM – Breakfast by the Sea
    Return to your hotel and enjoy breakfast with a view of the Bohol Sea.

    9:00 AM – Optional: Explore Oslob’s Heritage Sites
    Visit the Cuartel Ruins, Baluarte Watchtower, and the Immaculate Conception Church — all within walking distance. It’s a peaceful way to wind down your visit.

    11:00 AM – Travel Back
    Catch your ride back to Dumaguete or Cebu depending on your route.


    🧳 What to Pack

    • Swimwear + cover-up
    • Quick-dry towel
    • Reef-safe sunscreen
    • Aqua shoes / sandals
    • Waterproof bag or dry pouch
    • GoPro or waterproof phone case
    • Cash (some places don’t take cards)

    🌿 WanderMapped Tips

    • Visit between November to May for the best weather
    • Avoid weekends if you want fewer crowds
    • Respect marine life: no touching, stay 4 meters away from whale sharks
    • Book your canyoneering and whale shark tours ahead (especially in high season)

    Oslob may be small, but it offers huge experiences — from waterfalls to wildlife, all packed into a short stay. This overnight itinerary gives you the perfect balance of thrill and chill, whether you’re a weekend warrior or a business traveler squeezing in a quick tropical escape.

  • 🌏 Traveling Solo in Southeast Asia: Tips for an Unforgettable Adventure

    Southeast Asia is a dream destination for solo travelers. It’s budget-friendly, full of culture, and packed with once-in-a-lifetime experiences. Whether you’re craving temple-hopping in Cambodia, beach bumming in the Philippines, or food-tripping in Vietnam, this region makes solo adventures easy, safe, and unforgettable.


    🌴 Why Travel Solo in Southeast Asia

    • Budget-Friendly: Affordable accommodation, cheap eats, and low-cost transport options abound.
    • Social Scene: Backpacker hubs and hostels make meeting fellow travelers a breeze.
    • Safety: Generally safe for solo travelers—especially with a bit of street smarts.
    • Adventure Galore: Beaches, mountains, temples, jungles—take your pick!

    💡 Solo Travel Tips for Southeast Asia

    1. Start with a Soft Landing Spot
    Begin your trip in a traveler-friendly city like Bangkok, Bali, Manila or Ho Chi Minh. These places are well-connected and full of fellow solo travelers.

    2. Pack Light but Smart
    Stick to the essentials:

    • Breathable clothes
    • Sandals or walking shoes
    • Dry bag
    • Universal adapter
    • Power bank
    • Reusable water bottle

    👉 Check out my Ultimate Packing List for the Philippines—most tips apply across Southeast Asia!

    3. Use Travel Apps
    Apps like Grab, Google Maps, and offline translators can make your travels much easier. Get a local SIM card or eSIM as soon as you land to stay connected.

    4. Book Accommodation with Good Reviews
    Stick to well-reviewed places, especially when traveling solo. Hostels and guesthouses are great for meeting people—just double-check the safety of the neighborhood.

    5. Join Group Tours or Local Classes
    Cooking classes, street food tours, and island-hopping are not only fun but also a great way to meet fellow travelers.

    6. Trust Your Instincts
    If something feels off, trust your gut. Stay alert but open. Most people are kind—but solo travel is all about awareness.

    7. Stay Connected
    Share your itinerary with someone back home. Apps like Life360, WhatsApp, or Find My can help family and friends check in. You can also join solo travel communities on Facebook or Reddit for tips and support.


    🌟 Best Countries for Solo Travel in Southeast Asia

    • Thailand – Perfect blend of adventure and chill.
    • Vietnam – Great food, landscapes, and a fun backpacking trail.
    • Indonesia (Bali) – Yoga, beaches, and a strong solo traveler community.
    • Philippines – Warm locals, incredible islands.
    • Cambodia – Affordable and full of history.
    • Malaysia – Diverse culture and underrated nature spots.

    🧳 Final Thoughts

    Traveling solo in Southeast Asia is a rite of passage for many adventurers. You’ll meet incredible people, push your boundaries, and create stories to last a lifetime. If you’re dreaming of a life-changing experience—this is your sign to go.

    ✨ Follow WanderMapped for more guides, tips, and tools to plan your perfect trip. More solo-friendly itineraries coming soon!


  • Travel Tips for First-Time Travelers to the Philippines

    Tranquil beaches like this await you in the Philippines 🇵🇭

    🌟 Why You’ll Fall in Love with the Philippines

    • Breathtaking Nature – Think turquoise lagoons, dramatic limestone cliffs, white-sand beaches, and lush rice terraces.
    • Warm, Welcoming People – Filipinos are incredibly friendly and helpful, and English is widely spoken — major bonus for first-time travelers!
    • Affordability – You can enjoy stunning destinations, delicious food, and unforgettable tours without breaking the bank.
    • Island Variety – Every island has a different vibe: party in Boracay, relax in Siquijor, or explore wildlife in Bohol.
    • Sunshine All Year (Mostly!) – The Philippines has a tropical climate that’s perfect for beach lovers, especially from November to May (dry season).

    🧳 10 Must-Know Tips for First-Time Travelers

    1. Don’t Overpack – Go Light and Beach-Ready

    Local flights often have tight baggage limits. Stick to breathable clothes, comfy shoes, and travel-sized toiletries.
    🧡 Pro Tip: A compact travel backpack like this one is perfect for island hopping.


    2. Cash is King (But Bring a Card Too)

    Most places outside major cities are cash-based. Have pesos ready for tricycles, meals, and entry fees.
    ATMs are available but can run out in remote areas.


    3. Book Domestic Flights Early

    Flights between islands (like Manila to Coron or Cebu to Siargao) fill up fast and can get pricey last-minute — book early to save money!


    4. Try Jeepneys and Tricycles (Safely!)

    These fun local rides are cheap and everywhere. Just be sure to agree on the price before hopping in.


    5. Stay Connected with a Local SIM Card

    Pick up a prepaid SIM (Globe or Smart) at the airport for cheap mobile data and easy access to Grab (the local Uber).


    6. Island Time is Real – Be Flexible

    Schedules change. Boats may be late. Weather might delay things. Build in buffer time and embrace the laid-back island pace.


    7. Respect Nature and Local Culture

    Use reef-safe sunscreen like this one, skip single-use plastics, and be respectful when visiting sacred or eco-protected areas.


    8. Travel Insurance is a Must

    Especially if you’re doing adventurous activities.
    🧡 I recommend SafetyWing or World Nomads for peace of mind.


    9. Plan Around the Weather

    The dry season (Nov–May) is best for sun and sea. Rainy season (Jun–Oct) can bring typhoons — check weather updates when planning.


    10. Eat Local – You’ll Be Surprised

    Don’t miss adobo, lechon, sinigang, sisig and street snacks like banana cue and halo-halo. And grab some fresh hot pandesal from a bakery!


    🌴 Ready to Explore the Philippines?

    The Philippines is one of those magical places that leaves you sun-kissed, awe-inspired, and always wanting more.
    With a little planning and these tips in your back pocket, your first trip will be smooth, fun, and full of memories that last a lifetime.

    👉 If you found these tips helpful, check out my Ultimate Philippines Packing List next — I’ve got you covered from flip-flops to power banks!